 English
 Deutsch
 日本語
日本語 简体中文
简体中文
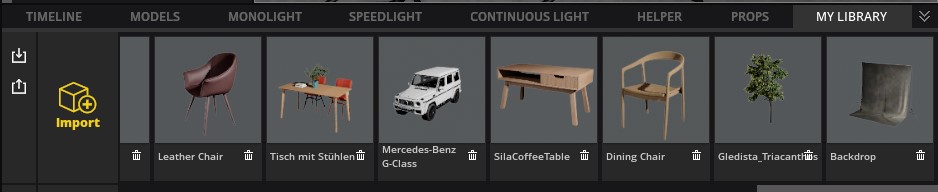
Import 3D Object
Click on “Import” in the “My Library” tab, in the file browser that opens you can now select the object to be imported.
The following file formats can be interpreted by set.a.light:
.fbx, .obj, .dea, 3ds, .lwo, .ply, .stl, .gltf und .glb
We recommend using .fbx, .obj and .dea.
After set.a.light 3D has imported and converted the object, you will find yourself in the 3D Importer. Depending on the size of the object and the textures it may contain, the process may take some time.
User interface
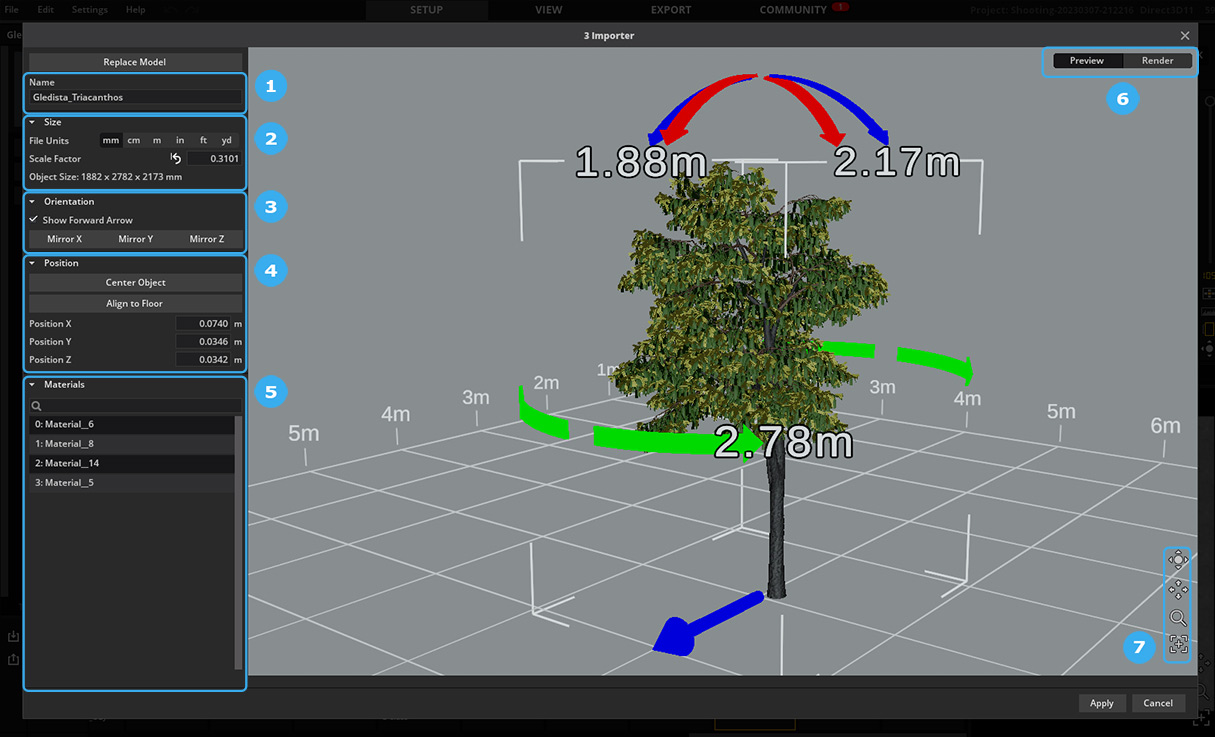
- Set name of the object
- Adjust size
- Object orientation in the room
- Positioning in the room
- List of materials
- Switching the view between preview and rendering
- 3D navigation
Object Alignment and Adjustment
Set the name (1) that the object should get. The name will be displayed later in “My Library”.
In the next step you can set the size (2) of the object.
The height, width and depth of the object will be displayed. If the object has the wrong size, you can change the unit of measurement first (often this is enough). You can make further adjustments by changing the scale factor and thus setting the object to the desired size.
If the object is no longer visible in the viewport due to the scaling (it is probably much too big/small), you can reposition it in the center by clicking on “Center Object” and “Align to Ground” in the Position (4) area. Next you can click on the center icon (7) in the bottom right corner to center the viewport as well.
If you change the positioning or the size, you should always click “Center Object” and “Align to Ground” afterwards to make sure that your object is aligned correctly. You should also click this button after the import.
Align object in viewport:
The blue arrow at the bottom of the 3D object shows the direction in which it will be oriented when you drag it into the studio.
If the object is lying or even stuck in the ground, you can rotate and tilt it using the red, blue and green arrows. When you click on the arrow, the object will move 90° in the corresponding direction.
Note: The arrows on the object change its orientation in space. To rotate the viewport, use the pressed right mouse button or the navigation at the bottom right (7)!

Often the positioning in space does not fit anymore if an object has been rotated. Click on in the area (4) “Center object” and “Align to floor” to position it again. If the automatic does not hit exactly, you can change the values in X, Y and Z by hand.
Set materials and shaders
Edit material:
You can select a material in two ways. Click on the desired material in the material list (5) on the left, or click directly on the desired area of the 3D object (in the viewport).
When selecting the material, the area of the material is briefly indicated by a yellow light, so you can better see which area the material covers.

Each material can be set for itself. When you have selected a material, the editor for the material opens.

- Shader selection
- Selection of color map and color setting
- Selection of the normal map
- Selection of the smoothness map (Roughness-, Smoothness Map)
Select shader (1):
Select the appropriate shader.
You can choose between Standard, Transparent, Cutout and Hair. Depending on the type of object/material, a different shader with different properties is required. You can find a description of each shader HERE.
In most cases “Standard” is the right choice. Depending on the shader, different setting options are available.
Import Color Texture and select it (2):
It is possible to import textures with a resolution of up to 8K (8,096 px). We recommend using textures with up to 2K (2048 px), as this will reduce the load on the RAM of the graphics card and thus the software will work more performantly.
Select texture:

To be able to select a color texture, you have to import it (1). If the object has been well preset by the creator (3D artist), the textures will be imported and assigned automatically.
There are two types of texture import:
- Textures that are only available for the respective object (2)
- Textures that you can use later for other objects (3)
Since many textures only make sense for the respective object, they should also only be imported as an embedded texture, so you keep better track.
In area (4) you can select the texture you want to use.
The scale indicates if and how the texture will be tiled on the object. With the color you can overlay the color texture. If no texture is selected (or present), you can use it to colorize the model.
All changes have a direct effect and you can see them in the viewport. It is advisable to switch the viewport frequently between preview and render to better evaluate the object.
Copy texture to “Own textures”:
If you like an embedded texture and want to use it later for other objects, right-click on the texture and select “Copy to my textures”. This will add the texture to your collection of own textures. In order for the current object to access the correct file, you should then select the texture via “Own textures”.
Normal (3):
The normal map describes the structure of the surface that also influences the light. Often a normal map looks optically blue. This is a quick way to recognize it (in addition to the name).
You can import the normal map in the same way as the color map before.
With the slider “Strength” you can control how intensive the effect of the normal map should be displayed. To be able to judge the effect better, it is good to let the light shine on the object from the side. To do this, switch to “Render” in the viewport. With “Y Invert” you can invert the effect of the normal map. Depending on the type of map, this may be necessary from time to time.
Glossiness Map (4):
If the object provides a gloss map, it can be imported and applied. With the “Smoothness” slider, the intensity of the gloss can be adjusted.
There are two types of gloss maps: the smoothness map and the roughness map. Depending on which map is available, you need to set the appropriate type here:

It is very important to select the correct type of map, otherwise the gloss will be displayed incorrectly. Most of the time, set.a.light 3D already automatically detects the appropriate version and selects the correct texture type.
Evaluate 3D model:
To better see how the individual maps work and how to set their intensity, you can change the display mode between “Preview” and “Render” (user interface (6)) in the upper right corner.

If you select “Render”, the object is illuminated with a 3-point light, which you can adjust yourself.
To better evaluate the settings of the 3D object, it makes sense to view the object from different viewing directions. To do this, you can adjust the navigation area at the bottom right.
The navigation works like in the studio view. You can rotate the viewport with the right mouse button pressed, or zoom in and out with the mouse wheel.
Import Finalize:
When you are satisfied with the settings, you can “Apply” the object and use it in set.a.light 3D.

You will find the new object in “My Library” as the last entry. You can sort the list by grabbing the object with the mouse and moving it to the new position.

Edit object:
If you want to edit an object later, you can select it in your library and choose “Edit object” in the upper left corner. The familiar 3D importer will open. Here you can edit all settings and apply them at the end.
Remember: If you edit an object in the 3D Importer, it will later be displayed in the updated form in all previously created images.
