You can adjust various settings of the software under the “Settings” menu in the menu bar.
Language settings
“Settings” -> “Deutsch” , “English” or “Francais” or Portugues (BR)
(BR)
You can choose between the following languages: – German – English, German – French – Brazilian Portuguese
Note: If you change a language, it will be adopted directly.
adopted.
Measuring system: Switching Metric-Imperial
“Settings” -> “Metric (m)” oder “Imperial (ft)”
The measurement system can switch between Metric and Imperial. All dimensions will be specified according to your selection in meters (m) or feet (ft).
Laser Pointer on / off
“Settings” -> “Laser Pointer””

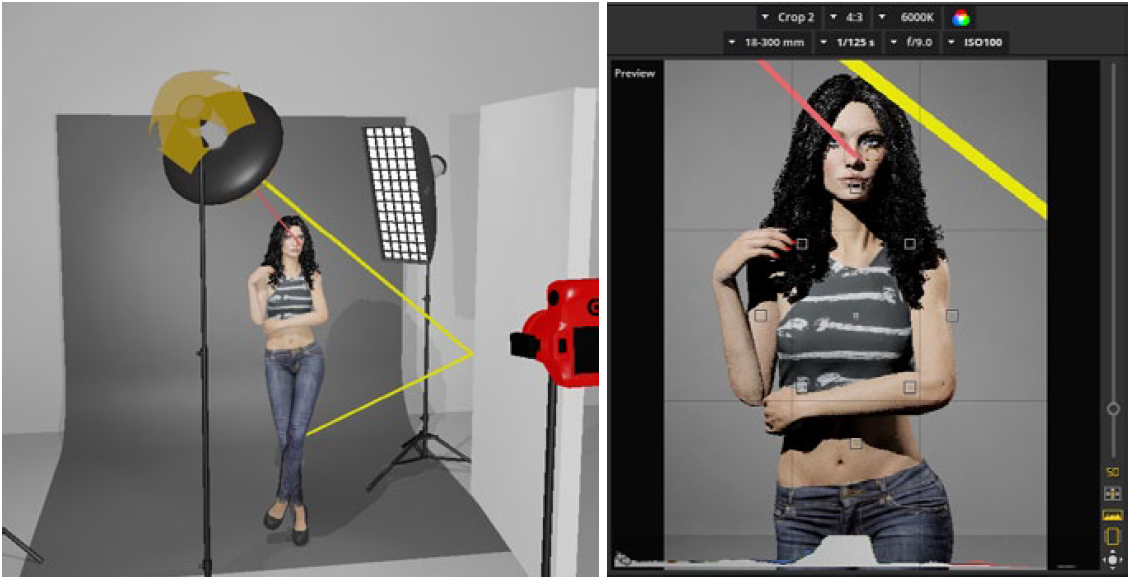
If a you move a light shaper in the studio, so the laser pointer indicates the direction of the light. This helps to orient he light sources quickly and specific.
Lens Flare on / off
“Setting” -> “Lens Flare”
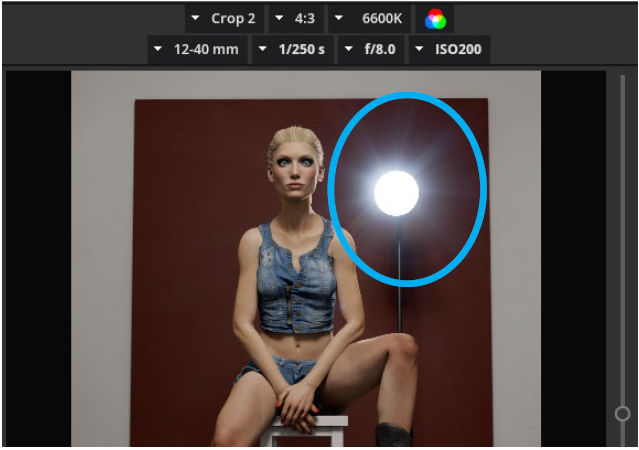
You can enable or disable the glare (lens flare), that arises during back light photos, in the settings

Note: Lens flare arises only by using hard light modifiers. By
using Softboxes with diffusor, the effect does not arise.
Quality options
“Settings” -> “Quality Settings”
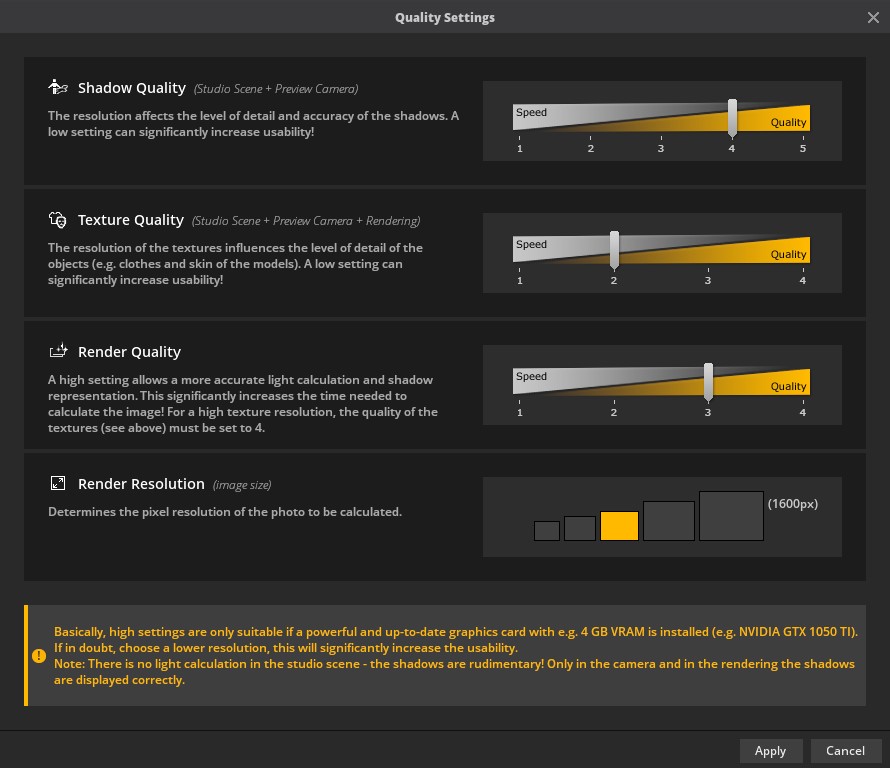
Under the menu item “Settings” you can select the “Quality settings“. These settings let you regulate the response speed of your software.

The following options are available:
1. Shadow quality
(affects preview camera)
The resolution affects the level of detail and accuracy of the shadows. A low setting can significantly increase usability.
Note: In level 1, only a heavily reduced light calculation takes place, which means the display is rudimentary.
takes place, which means that the representation is rudimentary.
2. Texture quality
(affects studio scene + preview camera + rendering) The resolution of the textures influences the level of detail of the objects (e.g. clothes and skin of the models). A low setting signifi signi – cantly increase usability.
2. Render quality
A high setting allows a more accurate light calculation and shadow representation. This significantly increases the time needed to calculate the image!
Note: For a high texture resolution, the quality of the
textures (see above) must be set to 4.
3. Render resolution
Determines the pixel resolution of the photo to be calculated.
Tip: Depending on the performance of your hardware,
we recommend the following settings:
Studio quality Level 3
Texture Quality Level 2
Render quality Level 3
Render resolution Middle setting (1200 px)
4K Display Mode
“Settings” -> “4K Display Mode” “
If set.a.light 3D cannot correctly detect the resolution of your display, you can manually set the user interface to 4k resolution here.
Note: Use this option: Use this option only if the display does
not fit, because the display changes immediately

 English
 Deutsch
 日本語
日本語 简体中文
简体中文